
I've played around quite a lot with OpenGL and built my own engine to some extent (as you can see in other posts on this blog). But I want to create games, doing that with a home-written engine puts a lot of focus on the engine and very little on the actual game. So I decided to try out Unity as it seems popular and has nice integration with Visual Studio
Getting started
Install both and start Unity.
 |
| First screen in Unity. Just click on the New button to the upper right to create our first project |
 |
| Name the project and select where it should be placed on disk. I also disabled unity analytics as I don't think that this test project would have any usage for it. |
Configure script editor
Next step is to make sure that Unity thinks that Visual Studio should be used for script editing
 |
| Go to Edit menu -> Preferences and in the popup select External Tools and make sure that External Script Editor is set to Visual Studio 2017 (Community). Or any other version of Visual Studio if you have the licensed versions |
Logging to screen
I like to have stuff happening on the screen, and in my mind the first step should be to add logging to screen so that we can follow what happens in the game without having to tab out to the Unity editor (or when we run the game outside of the development environment)
So, how to accomplish logging to screen?
 |
| In the project tab. Assets folder, create a new folder and name it Scripts |
- Create a new folder called scripts (see above picture)
- Create a new C# script in that folder and call it Logger
 |
| In the SampleScene create a new empty GameObject and call it Screen Logger |
- Create a new GameObject and call it Screen Logger
- Select the Screen Logger GameObject and drag the Logger script to the Inspector view for the screen logger to attach the script to the GameObject
 |
| Screen Logger Game Object with attached Logger script in the Inspector view |
Next, let's create the UI component that we will log to.
- Right click in the Sample Scene tab and select UI -> Text
- Rename the newly created Text to Log
 |
| Scene view with the Log Text control (New Text), 2D view selected in the upper left corner and the white line is the borders of the canvas |
- Go to the Scene view and click on the 2D button at the top so that we can position our UI component
- Select the Log Game Object and move your mouse cursor over the Scene view and press F on the keyboard. This will find and focus the view on that particular component.
- Zoom out with your mouse-wheel so that you see the canvas borders
 |
| Resized textbox to fill the upper area of the canvas |
- Resize the textbox so that it fills the upper area of the canvas. Notice the color change of the canvas border when the textbox is at the border.
 |
| In the Inspector, set stretch and anchor to the top of the canvas |
- Select the text box and go to the inspector. Select stretch and anchor point according to the picture above
Logger script
So, now we have our UI component setup and placed at the top of the canvas area, lets look at the Logger script.
using System;
using System.Collections.Generic;
using UnityEngine;
using UnityEngine.UI;
public class Logger : MonoBehaviour
{
    public static Logger Instance { get; private set; }
    public Text Log;
    private List<string> _logLines = new List<string>();

    void Start()
    {
        Instance = this;
    }

    void Update()
    {
        // test code to check that this works
        Write(Time.fixedTime.ToString());
    }

    public void Write(string text)
    {
        _logLines.Add(text);
        if (_logLines.Count > 3)
            _logLines.RemoveAt(0);
        Log.text = string.Join(Environment.NewLine, _logLines.ToArray());
    }
}
- Each script is generated with a Start and Update method.
- The static Logger Instance will help us access this script from outside (Singleton pattern). We assign it with this in the Start method (Start is guaranteed to only execute once)
- Next we add a using UnityEngine.UI; line to the top and a public variable called Text Log. This will allow us access to an UI component in the scene. We will connect them in a later step, here we just say that we will be using a GameObject of type Text
- After that we define a private variable that holds a list of strings that have been logger and initialize it inline
- Now, create a new method called Write that takes a string as parameter.
- Add the input parameter to the list of strings and then we make sure that the list doesn't grow by removing old items if there are more then 3 items in the collection.
- Lastly we join all strings in the list with a new line between each and assign it to the text field of the Text UI component.
And that's pretty much it. You can of course play around with more information but this is the basic logging capability that I am after.
Notice the Update method calls the Write each frame, this is only for testing purposes and the whole Update method can be removed once we know that the script works.
 |
| Connect our Log text element to our Logger script in the Screen Logger game object inspection Click on the small circle to the right of the field to popup the Select Text dialog. It will show all GameObjects in the scene of the type Text. |
- In the inspector for Screen Logger, click on the small circle to the right of the Log field to popup the Select Text dialog
- As we only have one Text component in the scene at the moment, just select it and close the popup
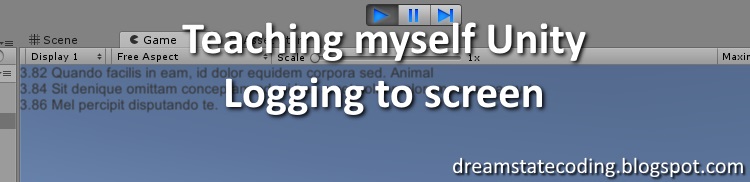
 |
| The end result of our logger in action, currently printing out the time each frame |
So it works, you can now remove the Update method from the script as it is not really needed.
Usage from other scripts:
Usage from other scripts:
Logger.Instance.Write("information that we want to put on screen");
That's it!
2 great resources that helped me a lot were:
All code provided as-is. This is copied from my own code-base, May need some additional programming to work. Use for whatever you want, how you want! If you find this helpful, please leave a comment or share a link on social media, not required but appreciated! :)
No comments:
Post a Comment